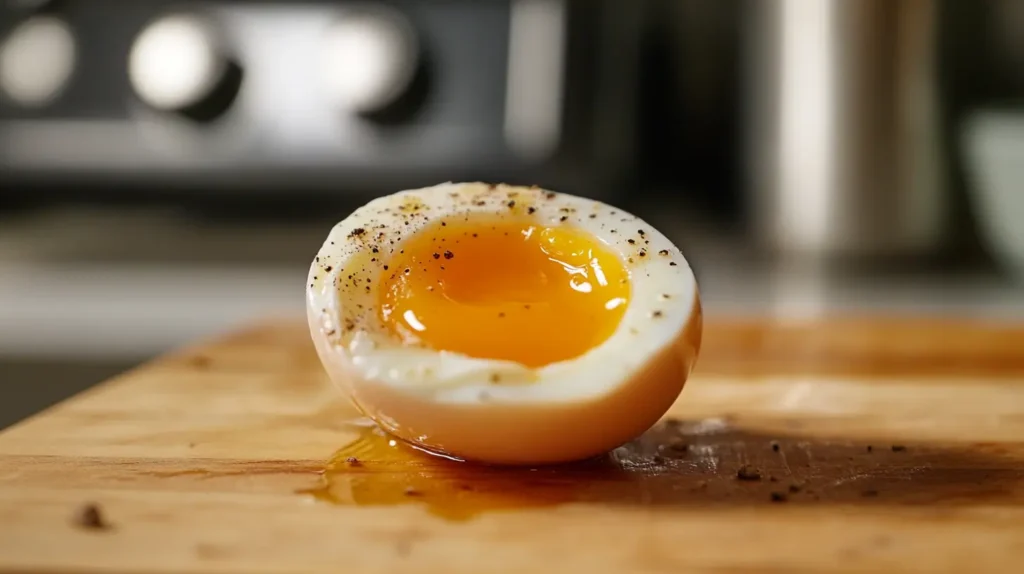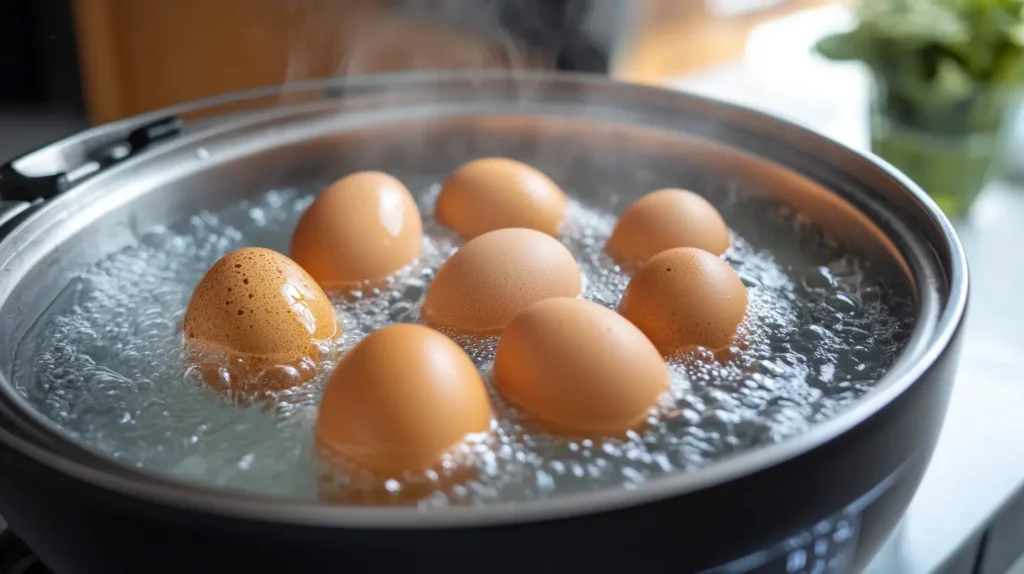
Eggs are truly a culinary marvel, as they transform in texture and taste with even the slightest changes in cooking techniques. Among the most intriguing methods, however, is the 60-minute egg—a precision-cooked delight that is revered by chefs and food enthusiasts alike. Not only is it perfectly balanced between soft-boiled and poached, but this technique also unlocks creamy yolks and delicate whites, which can elevate almost any dish.
In this article, we’ll explore everything you need to know about crafting this culinary masterpiece. First, we’ll start with the basics to understand the process. Then, we’ll uncover the science behind it, highlight the tools you’ll need, and guide you step-by-step through the recipe. Finally, we’ll share creative ways to serve this versatile egg. Whether you’re a home cook or a seasoned chef, this guide will help you master the art of the 60-minute egg. So, let’s get cracking!
Understanding How to Make a 60 Minute Egg
What is a 60 Minute Egg?
The term “60-minute egg” refers to an egg cooked at a precise low temperature, usually around 60°C (140°F), for an hour. This method ensures a custard-like yolk and tender whites, creating a unique texture that stands apart from traditional boiled eggs. Unlike the quick dunking of soft-boiled eggs or the high heat of frying, the 60-minute egg embraces slow, gentle cooking.
This technique has roots in the professional kitchen, where chefs use sous vide machines to create consistent results. Sous vide cooking, which translates to “under vacuum,” involves sealing food in a bag and immersing it in temperature-controlled water. It’s a method that allows unparalleled control over doneness.
Why Cook Eggs for 60 Minutes?
Now, you might wonder—why bother cooking an egg for an entire hour? The answer lies in texture and precision. At lower temperatures over longer durations, the proteins in the egg white coagulate gently, giving it a soft, silky feel without becoming rubbery. The yolk, meanwhile, achieves a creamy, custard-like consistency that no other method replicates.
Additionally, the 60-minute egg isn’t just about aesthetics; it’s about versatility. These eggs are incredibly adaptable, seamlessly complementing salads, toast, ramen, and even gourmet dishes. Whether you’re looking to wow guests or just upgrade your breakfast game, this egg delivers.
The Science Behind How to Make a 60 Minute Egg
Temperature Control and Egg Consistency
When it comes to how to make a 60 minute egg, precision is everything. Eggs are mostly made up of proteins, and these proteins respond differently to heat. At low, controlled temperatures, they transform gradually, creating the creamy texture that makes 60-minute eggs so unique.
The magic happens at around 60°C (140°F). At this temperature, the egg white coagulates just enough to hold its shape without becoming tough or rubbery. The yolk, on the other hand, thickens into a luscious custard-like consistency. The slow, steady cooking prevents overcoagulation, which is the bane of rubbery eggs.
Interestingly, the yolk and whites cook at slightly different temperatures. This delicate balance is why the sous vide method works so well—it keeps the temperature steady, allowing both parts of the egg to achieve perfection simultaneously.
Sous Vide Method vs. Traditional Methods
The sous vide technique is the gold standard for how to make a 60 minute egg. By maintaining an exact water temperature, sous vide ensures that every egg comes out consistent. You don’t have to hover over the pot or guess whether it’s done—just set it and forget it.
But what if you don’t own a sous vide machine? Don’t worry; there’s still hope. With a little extra attention, you can mimic the process on the stovetop. Use a thermometer to keep your water bath at the right temperature. It may require more monitoring, but the results will be worth it.
In short, temperature control is the secret ingredient. Whether you use sous vide or a stovetop, getting the right heat is essential for creating the ideal 60-minute egg.
Essential Tools and Ingredients for Making a 60 Minute Egg
Sous Vide Equipment and Alternatives
To achieve the perfect 60-minute egg, the right tools make a big difference. A sous vide machine is the most reliable option, as it keeps water at an exact temperature for as long as needed. Brands like Anova or Joule offer affordable and user-friendly devices that are perfect for beginners.
Don’t have a sous vide? No problem. A large pot and a digital thermometer can work as a substitute. The key is to monitor the water temperature closely. You’ll need to adjust your stove’s heat regularly to keep the water steady at 60°C (140°F). While this method takes more effort, it can still deliver good results.
Choosing the Right Eggs
Not all eggs are created equal. When learning how to make a 60 minute egg, start with fresh, high-quality eggs. Fresher eggs have firmer whites, which help maintain the shape during cooking. Look for eggs labeled as free-range or organic, as they often have better flavor and consistency.
Room temperature eggs work best for even cooking. If your eggs are straight from the fridge, let them sit in warm water for a few minutes before cooking. This small step ensures smoother results and helps avoid temperature shocks.
With the right tools and ingredients, you’re well on your way to mastering this culinary delight. Next up: the step-by-step recipe for creating your perfect 60-minute egg!
Step-by-Step Recipe: Making a Perfect 60 Minute Egg

Setting Up Your Sous Vide Machine
If you’re ready to master how to make a 60 minute egg, the first step is setting up your sous vide machine. Fill a large container or pot with water and attach your sous vide device to the side. Set the temperature to exactly 60°C (140°F) and allow the water to heat up. The precision of sous vide cooking ensures that the eggs cook evenly, resulting in that coveted creamy yolk and delicate white.
Once the water is preheated, gently lower your eggs into the bath using a slotted spoon. Be careful not to overcrowd the pot; each egg should have enough space to cook without bumping into others.
Cooking the Egg
After placing the eggs in the water, set a timer for exactly 60 minutes. During this time, the sous vide machine will maintain a constant temperature, allowing the eggs to cook slowly and evenly. There’s no need to stir or adjust the setup—just let the process work its magic.
Once the timer goes off, remove the eggs and place them in a bowl of ice water for about one minute. This step stops the cooking process and makes peeling easier.
For readers seeking related recipes, explore the baked egg casserole recipe for another creative way to enjoy eggs.
Troubleshooting Common Issues
Even with precise methods, a few hiccups can occur. If your eggs come out too runny, check the temperature of your water bath—it might have been too low. Conversely, if the yolks are too firm, the temperature could have been slightly high or the cooking time too long. Invest in a reliable thermometer to ensure accuracy.
By following these steps, you’ll soon find yourself creating perfect 60-minute eggs, every single time.
Creative Ways to Use 60 Minute Eggs
Serving Suggestions
Now that you’ve mastered how to make a 60 minute egg, it’s time to think about presentation. These eggs are incredibly versatile and can elevate any dish. For breakfast, place one atop buttery toast sprinkled with flaky salt and cracked black pepper. Add some avocado for a nutritious twist!
For lunch or dinner, pair your 60-minute egg with a fresh salad. The creamy yolk acts as a natural dressing when mixed with greens. Alternatively, try it as a topping for ramen or rice bowls. Its rich texture complements the umami flavors beautifully.
Gourmet Pairings and Recipes
For a more gourmet approach, use your eggs to enhance hors d’oeuvres. Place slices of 60-minute egg on crostini with smoked salmon, or use them to garnish asparagus spears for a visually stunning dish. The eggs also shine in minimalist dishes like carbonara, where their creaminess enhances the pasta without the need for heavy cream.
Looking for more culinary ideas? Check out this guide on egg casserole dishes to expand your egg repertoire.
By exploring different serving options, you’ll discover the endless potential of this deceptively simple egg. Its versatility makes it a go-to ingredient for cooks of all skill levels.
Frequently Asked Questions
What is the Ideal Temperature for a 60 Minute Egg?
When learning how to make a 60 minute egg, nailing the temperature is key. The standard temperature is 60°C (140°F), which ensures a silky white and a custard-like yolk. Some cooks prefer slight variations between 60°C and 63°C (140°F to 145°F) to adjust for personal texture preferences. The beauty of this method is its consistency—once you find your ideal setting, you can replicate it every time.
If you’re experimenting with stovetop methods, remember to check the water temperature frequently. Use a digital thermometer to avoid fluctuations that might affect the outcome.
Can You Make a 60 Minute Egg Without Sous Vide?
Yes, you can! While sous vide machines make the process easier, you can achieve similar results on a stovetop. Fill a large pot with water and heat it to 60°C (140°F). Once the water is stable, carefully add the eggs and monitor the temperature closely for the next hour. It’s a bit more hands-on than using sous vide, but it’s definitely doable with patience and precision.
How Long Can You Store 60 Minute Eggs?
Once cooked, 60-minute eggs can be stored in their shells in the refrigerator for up to three days. To reheat, submerge them in warm water (not boiling) for a few minutes. Avoid microwaving, as this can ruin their delicate texture.
Are 60 Minute Eggs Safe to Eat?
Absolutely! The slow cooking process ensures the eggs are heated enough to eliminate harmful bacteria. However, always start with fresh, high-quality eggs to minimize risks. If you’re using the stovetop method, ensure the temperature remains consistent throughout the cooking process.
By answering these common questions, you’re now armed with everything needed to master how to make a 60 minute egg. Whether it’s perfecting the technique, troubleshooting, or storing, you’re well-prepared to enjoy this culinary marvel!
